It was only a couple of minutes long footage of a volcano erupting and he was hooked. All the documentaries about cute animals we watched were forgotten and the only thing that he wanted to talk about was that hot lava spewing into the ocean.
So we had to build a volcano...
I think the first time and actually the last time I made anything from paper mache was a little bunny rabbit face mask when I was 7. Thanks to the internet you don't have to think too hard to remember how you made it.
Doing paper mache volcanoes is a very popular children's activity and YouTube is filled with videos and detailed tutorials but here is how we did it. Although it can take 2 - 3 days it can be used time and time again.
you will need:
- some cardboard for a base of the volcano ( ors is about 50cm x 50cm)
- empty 1 litre plastic bottle, the widest neck as possible
- newspapers
- sellotape
- a small tupperware bowl to hold the glue mix
- PVA glue (we used washable children safe glue from the ELC you can get it on here: Early Learning Centre
- water for the glue mix
- paint to decorate your volcano (we also got ours from the ELC, you can get it on here: ELC
- See ingredients for making the magma which turns into lava below at day 3
Now let's get started !
Day 1
place the bottle in the middle of the cardboard base and attach it with a sellotape to keep it in its place

Now get scrunching!!
scrunch up the newspaper into small balls and start placing them around the bottle


Make the base as wide as you like and start placing more newspaper balls on top, securing them in place with sellotape as you go


when you happy with the rough shape of your volcano lets get paper mashing!
in the bowl mix the PVA glue and water (we did it almost half and half, maybe little bit more glue than water)
then cut the newspaper into wider strips, dip them whole in the mix and start placing them on the volcano both horizontally and vertically


when you happy with the shape, seal it all with more glue mix and let it dry (we left it next to a radiator and it was ready to be painted the next day
Day 2
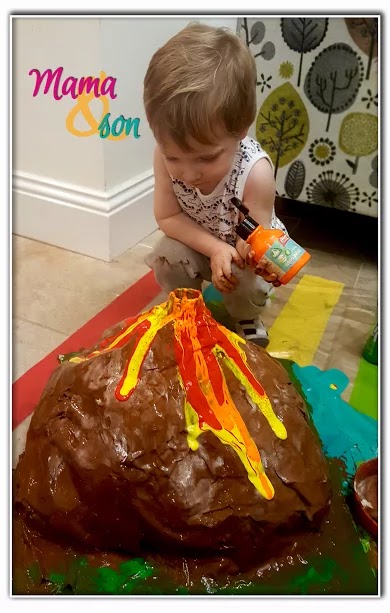
Now you can paint it as you like, Teddy has chosen brown colour and we added together touch of grey to give it more authentic look. We also mixed in little bit of the PVA glue to make the paint more resilient and withstand multiple eruptions!


And don't forget to add some lava!!
we used red, orange and yellow paint and just squirted it down from the crater.

Day 3
And now finally the fun part LET IT ERUPT!!!!!

to make a magma for your volcano you will need:
warm water (food colouring is optional but red lava looks much better than white one don't you think?)
bicarbonate soda (baking soda)
and some vinegar or 8% solution of citric acid
fill the crater with the warm water almost to the rim, leave just a little bit of space left. We have added red food colouring, add 2-3 spoons of soda and add the vinegar or citric acid solution and see it go!
You can follow us on Facebook: Mama & Son which gives access to more fun experiments
No comments:
Post a Comment